Porting a Face Detector Written in C to WebAssembly
In this article, we'll share the method we used to port our real-time face detection runtime written in pure C to WebAssembly. The resulting model including the WASM binary, face model are production ready, and already deployed on FACEIO, our facial recognition & authentication Web framework used by hundreds of thousands of developers to automate their authentication workflow using Face Recognition instead of the traditional login/password pair. The models are available to download below and ready to be integrated into existing projects in-need for real-time face detection in the browser.
In-browser Demo
All processing is done on the client side (i.e. your browser).
The article is broken down into independent small sections for easy reading:
- WebAssemby
- Face Detection
- The RealNet Face Detector
- The SOD Computer Vision Library
- The C/C++ API
- WebAssembly Toolchain
- Javascript Integration & API
- Model Deployment
- Conclusion
WebAssembly
WebAssembly is a new type of code that can be run in modern web browsers — it is a low-level assembly-like language with a compact binary format that runs with near-native performance and provides languages such as C/C++ and Rust with a compilation target so that they can run on the web. It is also designed to run alongside JavaScript, allowing both to work together. Source - MDN.
WebAssembly is designed to complement and run alongside JavaScript — using the WebAssembly JavaScript APIs, you can load WebAssembly modules into a JavaScript app and share functionality between the two. This allows you to take advantage of WebAssembly's performance and power and JavaScript's expressiveness and flexibility in the same apps, even if you don't know how to write WebAssembly code. Source - MDN.
Face Detection
Face detection has been a solved problem since the early 2000s but actually faces some challenges nowadays including finding tiny, non-frontal faces at real-time on cheap CPUs of low-end mobile/IoT devices.
Courtesy of PyImageSearch
The most widely used technique is a combination of Histogram of oriented gradients (HOG for short) and Support Vector Machine (SVM) that achieve mediocre to relatively good detection ratios given a good quality image. Here is how the algorithm works:
- Given an input image or video frame, compute its pyramidal representation which is a stack of multi scaled (maybe Gaussian) downed version of the original image. For each entry on the pyramid, a sliding window approach is used. The sliding window concept is quite simple. By looping over an image with a constant step size, small image patches typically of size 64 x 128 pixels are extracted at different scales. For each patch, the algorithm makes a decision if it contains a face or not. The HOG is computed for the current window and passed to the SVM classifier (Linear or not) for the decision to take place (i.e. Face or not). When done with the pyramid, a non-maximum suppression (NMS for short) operation usually take place in order to discard stacked rectangles.
- In our WebAseembly port, we'll be using the face detector shipped with the SOD computer vision library. This detector is based on an architecture named RealNets which uses a set of decision tress organized as a classification cascade that works at Real-time on the CPU of cheap Android devices and easily outperform the HOG/SVM combination. Let's talk about this architecture in the next section.
The RealNet Face Detector

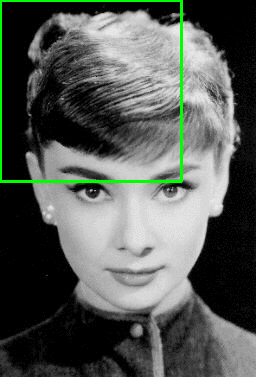
Face detection via sod_cnn_predict()
The basic idea behind the RealNet face detector algorithm is as follows:
- Scan the input image/frame with a cascade of binary classifiers at all reasonable positions and scales.
- A region of the target image/frame is classified as an object of interest if it successfully passes all the members of the cascade. Each binary classifier consists of an ensemble of decision trees with pixel intensity comparisons as binary tests in their internal nodes. This enables the detector to process image regions at very high speed.
- This implementation is based on the excellent paper: Object Detection with Pixel Intensity Comparisons Organized in Decision Trees and the independent code base is integrated and freely available within the SOD Embedded Computer Vision library that we will discus shortly.
The SOD Embedded Computer Vision Library
As said earlier, our port of the RealNet face detector is based on the SOD CV library implementation. For those not familiar with this library, SOD an embedded, modern cross-platform computer vision and machine learning software library that expose a set of APIs for deep-learning, advanced media analysis & processing including real-time, multi-class object detection and model training on embedded systems with limited computational resource and IoT devices. It's feature set includes:


- Built for real world and real-time applications.
- State-of-the-art, CPU optimized deep-neural networks including the brand new, exclusive RealNets architecture (Our port in this article).
- Patent-free, advanced computer vision algorithms (Hilditch Thinning, Hough Lines detection, Canny Edge detection, Minutiae feature extraction, etc.).
- Support major image format.
- Simple, clean and easy to use API.
- Brings deep learning on limited computational resource, embedded systems and IoT devices.
- Easy interpolatable with OpenCV or any other proprietary API.
- Pre-trained models available for most architectures.
- CPU capable, RealNets model training.
- Production ready, cross-platform source code (Android, iOS, Windows and UNIXs).
- SOD is dependency free, written in C, compile and run unmodified on virtually any platform & architecture with a decent C compiler.
- Open-source, actively developed & maintained product.
- Developer friendly support channels.
The SOD homepage at sod.pixlab.io is the starting point if you want to integrate the library into your existing project. You may find also useful the code samples page which host a set of real-world code samples or the getting started guide for a 5 minutes intro to the library.
The C/C++ API
Working with SOD RealNets is straightforward and require only few API calls. Below, a C code sample on how to detect faces from a given static image:

- A sod_realnet handle was instantiated by a call to sod_realnet_create() on line 41. This routine is often the first API call that an application makes and is a prerequisite in order to work with RealNets. You can find more information about the sod_realnet handle here.
- Next, a pre-trained RealNet model was registered via a call to sod_realnet_load_model_from_disk() on line 48. In our case, the model is a frontal face detector specialized in HD video tracking and is available to download from pixlab.io/downloads. You can also train your own model on your CPU via the RealNets training interfaces just by providing the required datasets (i.e. positive and negative samples). Notice that you can stack up as much models as you want and perform detection on multiple objects and thus mimic the CNN behavior with a fraction of overhead thanks to the flexible RealNets architecture.
- An image was loaded from disk in the grayscale color space via sod_img_load_grayscale() on line 51. Before detection, we need the raw grayscale pixels available as a stream of unsigned characters. This is done on line 63 via sod_image_to_blob().
- Real-Time detection occurs on line 72 via sod_realnet_detect() by just passing the raw grayscale pixels. The output is an array of bounding boxes holding the coordinates, score & class (name) for each reported object. Each entry of this array is represented by an instance of the sod_box structure.
- We consume the RealNet output by reporting how many objects were detected on line 75, we iterate through the bounding boxes array on line 80, print each object name (i.e. face), coordinates and confidence threshold and finally we draw a rose rectangle on each entry via sod_image_draw_bbox_width().
- Finally, clean-up is done via sod_free_image(), sod_image_free_blob() and sod_realnet_destroy() respectively on line 88, 90 and 91.
Keep in mind that RealNets are designed to analyze & extract useful information from video stream rather than static images thanks to their fast processing speed (less than 10 milliseconds on 1920*1080 HD stream) and low memory footprint making them suitable for use on mobile devices. You are encouraged to connect the RealNets APIs with the OpenCV Video capture interfaces or any proprietary Video capture API to see them in action.
WebAssembly Toolchain
As usual, we'll rely on the masterpiece that is Emscripten for this kind of task. Emscripten is a compiler toolchain for C/C++ targeting WebAssembly which let you compile your existing projects written in C/C++ and run them on all modern browsers. Under the hood, The compiler that Emscripten rely on to translates C code to WebAssembly byte-code is LLVM. LLVM itself never compiles one language straight to machine code. Instead, it has a front-end compiler that compiles your code to an intermediate representation (IR). LLVM can provide the middle layers of a complete compiler system, taking intermediate representation (IR) code from a compiler and emitting an optimized IR. This new IR can then be converted and linked into machine-dependent assembly language code for a target platform. LLVM can also generate relocatable machine code at compile-time or link-time or even binary machine code at run-time. Source - Wikipedia.
Once Emscripten installed on your system, we can start the port process. The basic idea is to expose the C/C++ functions responsible for the face detection process to JavaScript and invoke each on them from there. The Emscripten C compiler will help us with this. The following are the list of exported functions:
- _realnet_alloc_gray_image_buffer() responsible for buffer allocation.
- _realnet_alloc_face_result_array() which allocate an array big enough to hold the coordinates for each face detection pass.
- _realnet_face_max_detection() which return the maximum number of faces to be reported within a single pass.
- _realnet_face_detect() which perform face detection.
The Javascript Integration process is fully described in the next section. To generate the WASM binary, we simply invoke the emcc compiler as follows:
emcc realnet.c -o facemodel.js -Ofast -s EXPORTED_FUNCTIONS="['_realnet_alloc_gray_image_buffer', '_realnet_alloc_face_result_array', '_realnet_face_max_detection', '_realnet_face_detect']" -s WASM=1This will generate facemodel.js which contain boilerplate code to load the WASM binary. Note that if your browser does not support WebAssembly, it will fallback to array buffer instantiation via asm.js automatically for you. We describe now the integration process in details.
Javascript Integration & API
Integrating the face detector into existing web application is straightforward. All you need to do is:
- Declare a canvas & video element in your HTML template as shown respectively on line 17 and 18 of the gist nearby.
- Include the facemodel.js script on your HTML template as shown on line 31. This script take care of loading the WebAssemby model and automatically fall back to array buffer instantiation if your browser (Very unlikely) does not support WebAssmebly. More information on model deployment can be found here. The facemodel.js package have to be downloaded from pixlab.io/downloads.
- Request access to your user's camera input stream. This is done by calling mediaDevices.getUserMedia() on line 40.
- Once the authorization granted, you must install a play event callback for the video stream as shown on line 54. Once done, we can start capturing video frames and process each one of them sequentially.
- Each captured frame via getImageData() is converted inline to the grayscale colorspace. As the PixLab documentation state: A grayscale (or graylevel) image is simply one in which the only colors are shades of gray. The reason for differentiating such images from any other sort of color image is that less information needs to be provided for each pixel. In fact a `gray' color is one in which the red, green and blue components all have equal intensity in RGB space, and so it is only necessary to specify a single intensity value for each pixel, as opposed to the three intensities needed to specify each pixel in a full color image. Grayscale images are very common & entirely sufficient for many tasks such as face detection and so there is no need to use more complicated and harder-to-process color images.
- The face detection process start by a direct call to _realnet_face_detect(). This exported interface expect a Grayscale input image, its height and width, a confidence threshold and return the total number of detected faces plus their rectangle coordinates (X, Y, W, H) if any.
- For each detected face, we draw a rectangle on the canvas (line 74) giving the rectangle coordinates returned by _realnet_face_detect().
- The process is repeated again by requesting another frame which can be done via a call to setTimeout() or requestAnimationFrame().
Model Deployment
- The WebAssembly model have to be downloaded from pixlab.io/downloads. Once downloaded, just unpack the package on the directory where your HTML usage template reside.
- When you deploy the WebAssembly face model on your server, make sure your HTTP server (Apache, Nginx, etc.) return the appropriate MIME type for the wasm file extension. Under Apache, simply put the following directives on your .htaccess or Virtual host configuration:
- AddType application/wasm .wasm
- AddOutputFilterByType DEFLATE application/wasm
- For Chrome users, you must test the model on an actual web server, whether served locally (i.e http://127.0.0.1) or remotely. This is due to the fact that chrome does not allow WebAssembly modules to be loaded directly from the file system (Edge and Firefox do not have such issue).
Conclusion
Surprisingly, porting a complex piece of code to a relatively new technology stack is straightforward even for the non experienced developer, thanks to modern tools such Emscripten and LLVM plus a robust and healthy Web ecosystem.